FREE U.S. Shipping  •  30 Day Returns
FREE U.S. Shipping  •  Complimentary Engraving  See Details
Live Chat Software chatLive Chat    emailEmail   phone866-323-8463
Complimentary Engraving

Add a free laser engraved message (up to 20 characters) to any watch over $300. Just add your watch to the cart, click on "Engrave" to add your personal message and then add code ENGRAVE during checkout.

Complimentary engraving cannot be used on sale items or private offers and cannot be combined with any other promo code.

X
Gemnation
accountSign In  |  watch listList  |  shopping cartCart
Live Chat Support Software

Jewelry « Back to Education

  • DIAMONDS

    DIAMONDS

        
  • WATCHES

    WATCHES

        
  • JEWELRY

    Jewelry

        
    • Metal Alloys
    • Gold
    • Platinum
    • Rhodium
    • Jewelry Care
    • Resizing and Finishing

      Masters At Work - Ring Resizing and Finishing

      Resing a gold or platinum ring is an art form. While many jewelers are quite capable,
      only a master jeweler produces a flawless creation that is indistinguishable from a perfecly cast ring.

      The Torch

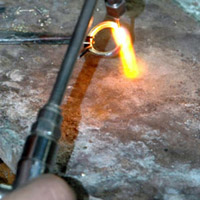
      The first step to resizing a ring (especially when decreasing the ring size which is discussed here), is to properly prepare the ring. Using a jeweler's saw, the bottom of the ring shank is cut to remove excess shank metal. Two open ends are thus formed. A file is then applied to smooth these ends. The jeweler now confirms that the shank is properly resized. A small sliver of the original metal is cut and will be added to the main shank to merge the open ends. When the ring and additional piece of metal are ready, they are carefully soldered together at high temperature with an acetylene torch (pictured in Figures 1 and 2). The ring is checked on a mandrel to ensure that its circumference is true and round. If not perfectly round, it is carefully rounded using a rubberized mallet.
      Soldering Torch

      Figure 1: The soldering
      process. In the hands of a
      Gemnation Master Jeweler, the
      acetylene torch is applied to
      rejoin the resized shank.
      Solrdering a Ring

      Figure 2: During the soldering
      process, there is intense heat
      build-up. The jeweler must be
      exceptionally careful not to melt
      the ring.

      Pre-polishing

      The jeweler hands the ring to the polisher. Using a rubberized mounted silicon wheel, spinning at up to 21,000 rpm and containing an abrasive compound, the polisher creates a smoothed metal finish (Figure 3). It cuts and smoothes the metals surface and removes visible traces of sanding, filing, or other abrasive procedures. A large polishing brush (Figure 4) is then applied to pre-polish the outside of the ring. A smaller "dental" brush (Figure 5) cleans hard-to-reach inside areas and crevices. Additional tools like a cross-sander may also be applied.

      Rubber Wheel Pre-Polishing a ring

      Figure 3: The rubber wheel is
      used in the pre-polishing
      process.
      Coarse Polishing Brush

      Figure 4: A coarse polishing
      brush is used to pre-polish
      the outside of the ring.
      Small Brush is used to Pre-Polish the inside of the Ring

      Figure 5: A smaller brush is
      used to pre-polish the inside
      of the ring.

      Lapping

      A lapping wheel (Figure 6) is used carefully to ensure that the surface remains true and flat.

      A Lapping Wheel ensures a true even finish

      Figure 6: Lapping ensures a
      true and even finish.

      Polishing

      The polisher continues to work the outside surface of the ring with an 800 compound buffing brush (Figure 7). Following each polishing step, the ring is cleaned in the ultrasonic cleaner (Figure 8), then steam cleaned (Figure 9), and then progressed to the next compound. Finer and finer compounds will be used, including 4,000 compound, 6,000 compound and finally 8,000 compound.

      Buffing

      Figure 7: Buffing progresses
      from one compound to another,
      each progressively finer.
      Ultrasonic Detergent Bath

      Figure 8: The ultrasonic
      detergent bath cleans the ring
      using ultra-high sound
      frequencies.
      Steam Cleaing any remaining dirt

      Figure 9: Any remaining dirt is
      removed by steam-cleaning.
      When the polisher is certain the ring is free of any porosity, dirt, scratches, bumps, or any other surface imperfections, the polishing process is concluded and a final ultrasonic cleaning, steam-cleaning and electro-cleaning (Figure 10) are conducted. The ring, whether platinum or gold will now possess a striking mirror-like luster. Before the ring is sent to the shipping department, it is given to the quality controller who follows a ten point checklist to confirm, among other things, proper diamond or gemstone seating and pronging (if appropriate), pristine metal finishing, and appropriate hallmarking. The finished ring is now handed to the packing and shipping department.

      Electro-cleaning

      Figure 10: Electro-cleaning is
      the final cleaning step.
      In Association with Amazon.com

      Buy Books about Diamonds and Gems

      Gemnation has partnered with Amazon.com to bring you
      the most relevant diamond, gem and ring buying books and guides.
  • PEARLS

    PEARLS

        
  • RUBIES

    RUBIES

        
  • SAPPHIRES

    SAPPHIRES

        
  • BOOKS

    BOOKS

  • GLOSSARY

    GLOSSARY

Masters At Work - Ring Resizing and Finishing

Resing a gold or platinum ring is an art form. While many jewelers are quite capable, only a master jeweler produces a flawless creation that is indistinguishable from a perfecly cast ring.

The Torch

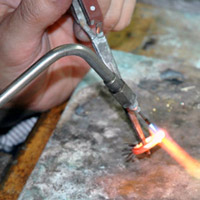
The first step to resizing a ring (especially when decreasing the ring size which is discussed here), is to properly prepare the ring. Using a jeweler's saw, the bottom of the ring shank is cut to remove excess shank metal. Two open ends are thus formed. A file is then applied to smooth these ends. The jeweler now confirms that the shank is properly resized. A small sliver of the original metal is cut and will be added to the main shank to merge the open ends. When the ring and additional piece of metal are ready, they are carefully soldered together at high temperature with an acetylene torch (pictured in Figures 1 and 2). The ring is checked on a mandrel to ensure that its circumference is true and round. If not perfectly round, it is carefully rounded using a rubberized mallet.

Soldering Torch

Figure 1: The soldering
process. In the hands of a
Gemnation Master Jeweler, the
acetylene torch is applied to
rejoin the resized shank.
Soldering a Ring

Figure 2: During the soldering
process, there is intense heat
build-up. The jeweler must be
exceptionally careful not to melt
the ring.

Pre-polishing

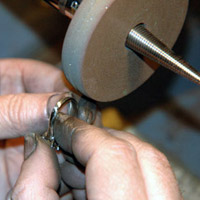
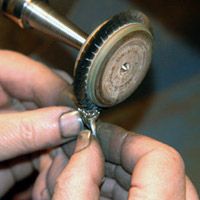
The jeweler hands the ring to the polisher. Using a rubberized mounted silicon wheel, spinning at up to 21,000 rpm and containing an abrasive compound, the polisher creates a smoothed metal finish (Figure 3). It cuts and smoothes the metals surface and removes visible traces of sanding, filing, or other abrasive procedures. A large polishing brush (Figure 4) is then applied to pre-polish the outside of the ring. A smaller "dental" brush (Figure 5) cleans hard-to-reach inside areas and crevices. Additional tools like a cross-sander may also be applied.
A Rubber Wheel is used to Pre-Polish

Figure 3: The rubber wheel is
used in the pre-polishing
process.
Coarse Polishing Brush

Figure 4: A coarse polishing
brush is used to pre-polish
the outside of the ring.
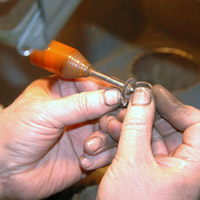
Small Brush is used to Pre-Polish the inside of a Ring

Figure 5: A smaller brush is
used to pre-polish the inside
of the ring.

Lapping

A lapping wheel (Figure 6) is used carefully to ensure that the surface remains true and flat.
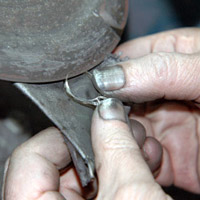
Lapping

Figure 6: Lapping ensures a
true and even finish.

Polishing

The polisher continues to work the outside surface of the ring with an 800 compound buffing brush (Figure 7). Following each polishing step, the ring is cleaned in the ultrasonic cleaner (Figure 8), then steam cleaned (Figure 9), and then progressed to the next compound. Finer and finer compounds will be used, including 4,000 compound, 6,000 compound and finally 8,000 compound.
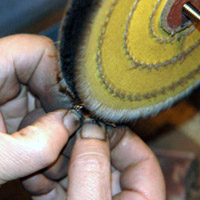
Buffing

Figure 7: Buffing progresses
from one compound to another,
eachprogressively finer.
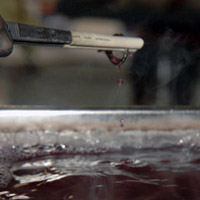
Ultrasonic Detergent Bath

Figure 8: The ultrasonic
detergent bath cleans the ring
using ultra-high sound
frequencies.
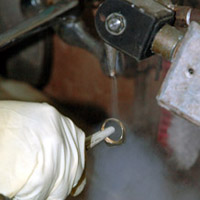
Steam Cleaning

Figure 9: Any remaining dirt is
removed by steam-cleaning.
When the polisher is certain the ring is free of any porosity, dirt, scratches, bumps, or any other surface imperfections, the polishing process is concluded and a final ultrasonic cleaning, steam-cleaning and electro-cleaning (Figure 10) are conducted. The ring, whether platinum or gold will now possess a striking mirror-like luster. Before the ring is sent to the shipping department, it is given to the quality controller who follows a ten point checklist to confirm, among other things, proper diamond or gemstone seating and pronging (if appropriate), pristine metal finishing, and appropriate hallmarking. The finished ring is now handed to the packing and shipping department.
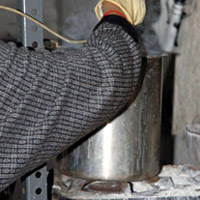
Electro-Cleaning

Figure 10: Electro-cleaning is
the final cleaning step.
In Association with Amazon.com

Buy Books about Diamonds and Gems

Gemnation has partnered with Amazon.com to bring you
the most relevant diamond, gem and ring buying books and guides.
Email Us Live Chat Call 866-323-8463 Call 718-663-3970